The Silk Grasshopper & French Silk Pie

Happy 2016 Snowstorm!

12584143_1002667516467519_227934241_n.jpg

As two Minnesotans now living in Maryland, we’re pretty excited about this storm. What’s even better is that we’re getting a ton of snow without the bitter cold temperatures. That’s a win. As long as everyone stays safe, this is one exciting storm!

12606793_1002666936467577_519899018_n.jpg

Alright, onto these two recipes. They have the same base, so this recipe is a 2 for 1 deal! I found the recipe for the French Silk Pies over at The Pioneer Woman. I doubled it, which ended up making a lot of pie filling. It ended up being  a bit runnier than I wanted it to be, so the recipe I’ll be providing is altered to make it more double-recipe-friendly. 

French Silk Pie Recipe:

  • 8 oz Unsweetened Baking Chocolate, still creamy, but cooled
  • 2 cups butter, room temperature
  • 2 1/2 cups sugar
  • 2 tsp vanilla extract
  • 4 whole medium eggs, fridge temperature
  • 1/4 cup heavy cream, fridge temperature
  • 2 Pie shells, either homemade or store bought (I was in a rush, so I used store bought)
  • Bonus: A package of Grasshopper cookies.

Whipped Cream

  • 1 (8 oz) cream cheese, room temperature
  • 1/2 cup sugar
  • 2 cups heavy cream, cold
  • 1 tsp vanilla
  1. Melt the baking chocolate either over a double broiler, or in the microwave according to packaging instructions. Cool, but make sure that it hasn’t started to harden. I found that it cooled off pretty quickly, within a couple of minutes.
  2. Starting with the batter attachment, In a mixing bowl beat the room temp. butter and sugar until nice and fluffy. (1-2 min.)
  3. When the chocolate is cooled, add it into the butter and sugar mixture. Then add the 2 tsp of vanilla extract.
  4. Switch the mixer attachment to the whisk. Then turn the mixer to a medium speed. Add 1 cold egg at a time, making sure to leave 5 minutes apart between each egg. This is really important! The cold egg helps smooth out the sugar and makes the pie nice and smooth. (note that the mixture will remain grainy for a while, but don’t stress! It will become smooth.)
  5. After all the eggs are in slowly add in the heavy cream. Mix on high to add a firm texture to the mix.
  6. Pour into a pie crust. I used Keebler chocolate and regular graham cracker shells. I actually had enough mixture for three pies, but only two crusts. (bonus recipe below)
  7. Set pies to set in the fridge for at least 2 hours before decorating.

For the Whipped Cream mix together the cream cheese and sugar. Next, add the vanilla in. Then set the bowl and whisk attachment into the fridge for a couple minutes. Lastly, slowly pour in the heavy cream while on medium, scrape down the sides and then mix on high until it peaks.

12584029_1002669396467331_737095603_n

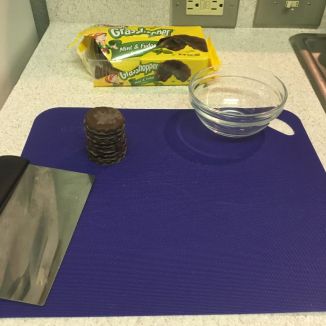
Bonus recipe time! So I had two pie crusts and enough filling for three. What was I to do? There was no I was going to waste any of the filling. So I went over to the pantry and found a bag of Grasshopper cookies. 

12626065_1002667796467491_1256810742_n

So I whipped up the Whipped Cream (corny baker puns, anyone?), crushed half a package of Grasshopper cookies and mixed it all together in a Corningware dish. It was SO good. I now happily call this creation The Silk Grasshopper. We brought it, along with one of the French Silk Pies, to a Board Game party on MLK day.  It’s always  awesome to get a second dessert that was effortless to make out of one recipe. So when you’re getting ready to make French Silk Pie I would highly suggest having Grasshopper cookies on hand. Plus they were both a huge hit! (Quick note that I only used some of the Whipped Cream in this. Make sure to save enough to decorate the pies with.)

Onto decorating the French Silk Pies! I chose to pipe the whipped cream onto the pies, but you can decorate it anyway that you wish. I’ve become very fond of making chocolate curls. They’re effortless, yet look so fancy. 

12584104_1002667659800838_1898119459_n

There’s a lot of ways to make chocolate curls, but I’ve found that the easiest way is to put the chocolate bar on a microwave safe plate and heat it just enough to soften it up slightly. (5-30 sec.) Then flip the chocolate bar over, take a vegetable peeler and start curling. It takes a bit of practice, but after getting the feeling of it they become easier to do and prettier. Also, let the curl sit for a couple of seconds before moving it. This will help make the curl more stable so it won’t crack when touched.

12571398_1002669503133987_914555120_n


So there we have it, a recipe that makes 2 French Silk Pies & The Silk Grasshopper. Two absolutely delicious desserts with just one base recipe! I’d consider that a dessert win.

12571415_1002667366467534_1830490786_n

Stay safe out there folks! For us, being snowed in gives us a much needed time of relaxing inside, getting some projects done and to just enjoy the snow as it peacefully comes down. Oh, and make sure to set a couple bowls out to collect snow for some Snow Ice cream!

12583986_1002716019796002_349259521_n

Mrs.Hess, out.


Chocolate Chip Cookie Dough Truffles

IMG_0061

Chocolate Chip Cookie Dough Truffles. Pinterest made me believe that they would be easy to make, but they ended up being quite the labor of love. I decided to double the recipe, which made 112 truffles! So, maybe it was my ambition that made them take longer than anticipated.

IMG_0060

I used this recipe for the truffles. I saw a lot of recipes that used condensed milk, but I didn’t have any on hand so I went for a recipe that called for water instead. This caused the texture to change quite a bit if they were left out of the fridge for too long. Personally, I prefer a creamy truffle so this was a problem for me. However, they did hold a classic truffle texture if they were eaten right of the fridge or freezer.

IMG_0062

I forgot to take a picture of the inside during the food shoot. Forgive me for the poor quality photo, but they were tasty! I have a bag in the freezer with the “oopsie” ones. They’re the perfect size to satisfy a sweet tooth craving.

IMG_2477

Well that’s it for now. Hope everyone is enjoying the rest of their summers!

Mrs.Hess, out.

Strawberry Rhubarb Crumble Pie

11748800_912547662146172_1804699809_n

This Strawberry Rhubarb Crumble Pie from Joanne over at Eats Well With Others is so stinkin’ good.

11737077_912547638812841_1254637231_n (1)

Tomorrow we’re going to a church picnic, which is what I made this pie for. However, I knew that I couldn’t wait until then to dig into it.

11739558_912545895479682_448894285_n

So I made a small pie for Sam and I. It was a very very smart decision.  I had a bite of it about ten minutes ago and the tangy sweetness that’s looming on my taste buds is begging me to go back for more. I really wish I hadn’t told Sam that he could finish that piece..

11721753_912547672146171_1287884076_n

My wonderful mother-in-law sent us 5.5 lbs of Rhubarb from her garden a week ago. Rhubarb is a pretty special vegetable in the Hess family and it sort of feels like she passed on the Hess Rhubarb Baton when she sent it to us. I absolutely love how food can bring people together by memories and traditions.

11759422_912547852146153_852398579_n

On that thought, this pie is just full of hand picked love. About a month ago Sam and I went Strawberry picking for the first time together and it was so much fun.

11774537_912561665478105_598050125_n

11741958_912547668812838_1494415624_n

Anywho, what ever you have planned this summer make sure to pencil in making this Strawberry Rhubarb Crumble Pie. I definitely plan on making this a summer tradition for us.

Oh! A couple Sunday’s ago we came across a little Farmer’s Stand and Sam picked me up a bouquet of my favorite flowers. I love my husband!

11737094_912562065478065_57847451_n

Mrs.Hess, out.

Peanut Butter Cookies Drizzled with Chocolate & Peanut Butter

11720007_906691422731796_926074202_n

How do you make a simple Peanut Butter Cookie better with little effort?

11717156_906691416065130_2026513523_n

By melting some chocolate and peanut butter and drizzling it over them. Really, it’s that simple and oh so creamy and delicious.

Let’s get right to the recipe:

Oven Temperature 350 degrees.

1/2 cup unsalted butter, room temperature.

1 cup peanut butter

3/4 cup sugar

1/2 cup dark brown sugar

1 egg

2 tsp vanilla

1 1/4 cup flour

1/2 tsp baking powder

1/4 tsp salt

For Drizzles:

1/2 cup peanut butter

1/2 bar milk or dark chocolate

First, cream the butter and peanut butter together until creamy. Then mix in the sugars until the mixture turns fluffy, about 1-2 minutes. Add the egg, milk and vanilla and mix well.

Second, mix the flour, baking powder and salt in a medium bowl and then add it to the mixture until blended, making sure to not over beat it.

Third, roll into 1 tsp balls and then roll them into sugar. Place them on a cookie sheet and bake for 10-12 minutes. Pull them out when they just begin to turn color on the edges. They continue to cook on the cooling rack, so make sure to move them onto the cooling rack not later than 1 minute after removing them from the oven.

As the cookies are cooling start to melt the chocolate and then use another pot to melt the peanut butter. I use the double broiler method.

11733302_906691409398464_96053777_n

Pour each of them into separate bags and clip a tiny corner off.

11719995_906691419398463_1291030622_n

And then just drizzle away, starting with the chocolate first.

11666983_906691412731797_1659535518_n

Within 1-1.5 hours you can have a couple dozen of these delicious and beautiful cookies ready to take to a Potluck or BBQ.I hope that you, your friends and family enjoy them!

Mrs.Hess, out.

Lavender Vanilla Cake

10927890_801869383214001_401995126_n

This is my all time favorite cake! Even as I’m writing this post, all I want to do is go make another of these so I can gobble it.

927401_299887253516454_1709148037_n

The combination of lavender and vanilla paired with fresh blueberries and raspberries just sits on your tongue like a fresh summer’s day – even in winter. I actually made this cake during the summer but never had the chance to post it, and now my friend Jenna is helping me out while I recover from my surgery.

Ingredients:

Lavender sugar:

1/2 cup sugar

2 sprigs lavender

Cake:

4.5 cups cake flour

2 Tbsp baking powder

1 teaspoon salt

2.5 cups buttermilk

8 large egg whites

3 cups sugar

1 cup unsalted butter, softened (room temperature)

4 teaspoons vanilla

Whipped Cream:

one 8 ounce package cream cheese

1/2 cup sugar

2 cups heavy whipping cream

1 teaspoon vanilla

10413118_315605268608048_601245610_n

For this recipe, I allowed lavender to sit in sugar for a week as an exciting substitute for boring normal sugar.

Lavender sugar: Since this process takes a week, decide if you want to make some extra now for other delicious experiments. First, wash the lavender. Second, allow the lavender to dry completely. Then, put the sugar and lavender in a tightly sealed container and allow them to get familiar for a week, shaking the container daily.

Vanilla Cake: 4.5 cups cake flour, 2 tbsp baking powder, 1 tsp salt, 2.5 cups buttermilk, 8 large egg whites, 3 cups sugar, 1 cup unsalted butter at room temperature , 4 tsp clear vanilla extract. First, preheat the oven to 350 degrees. Second, in a medium bowl sift together the cake flour, baking powder and salt. Set aside. Third, in another bowl, or a large measuring cup for easy pouring, whisk together the egg whites and buttermilk. Fourth, in the bowl for the mixer add the sugar and butter. Beat on medium for 3 minutes, or until light and fluffy. Add in the clear vanilla extract and beat until well mixed. Fifth, set the mixer on low and begin adding 1/3 of the flour mixture. Next add 1/2 of the buttermilk mixture and beat until well mixed. Keep repeating, making sure to end with the flour mixture. Then increase the speed to medium low and beat for another 2 minutes.

Baking: Sixth, prep two 8” cake pans with butter and flour. Pour the mixture evenly into each pan. You will have some leftover mixture that could either be thrown out or makes several cupcakes. (I always opt for the extra cupcakes to have a little treat around the house.) Put the pans into the oven and set the timer for 30 minutes. Check the cakes then, but they may take up to an hour, depending on how thick the cake is. They will be done when a tooth pick comes out clean. Then set the pans out on cooling racks. Cool inside of the pans for 5 minutes and then take the cakes out of the pans and cool them on the racks completely.

Whipped Cream: 1 Cream cheese, 1/2 cup lavender sugar, 2 cups heavy cream, 3 tsp vanilla. First, start with the paddle attachment. Cream the cream cheese, lavender sugar and vanilla together until creamy. About 3-5 minutes. Second, set the bowl and whisk attachment into the fridge for a couple of minutes. Third, take it out once it’s cold and then start adding the heavy cream slowly on medium. Once all the cream is added stop and scrape the bowl. Then put on medium high-high until it peaks. Optional: purple food coloring can be added at this point to give the whipped cream an even more lavender look.

Finishing touch: Now it’s time to put it all together! First, level both completely cooled cakes. Next, put the first layer on a cake round, cover with frosting, and place second round on top. Use remainder of frosting to cover the cake. Lastly, decorate and top it off with the fresh fruits as desired.

10893866_801867583214181_581980558_n

The recovery from my surgery is going well. I’m still in pain, but it’s improving every day. Thank you all for your prayers.

Mrs. Hess, out

New Years Cake

Happy New Years everyone!

10913442_796117363789203_1082665294_n

I made this Vanilla and Butter rum cake for a New Years Eve party Sam and I went to. I’ve had the design for this cake on my mind since September 26th, which was Sam’s golden birthday. I meant to make it for him, but got ill and wasn’t able to make him anything.

use

So I was excited to finally be able to try this design out. I’ve never made Hard Crack Candy before and was up for the challenge.

10904837_796117470455859_1962762205_n

I actually came into some trouble when I was making it. It’s easy to make, but it’s also finicky and all about the science. The first batch I made ended up turning into foam and then into a solid block. That’s when I learned that you have to put the flavoring in right after taking the pan off of the heat, instead of waiting for it to stop boiling.

10904346_796117457122527_2018365429_n

I didn’t add any food coloring because I planned on painting gold edible paint on it. Once the pieces were broken and the cake had a crumb coat on it I went to work on putting the pieces on, which took about an hour and a half.

967933_796128313788108_1348950248_n

I was really fighting with science here. After I put the edible paint on the pieces started to melt! At this point it was what is was. I put a boarder on it and hoped that they would stop gooping.

10913442_796117363789203_1082665294_n

In the end it wasn’t that big of a deal. Everyone at the party loved the butter rum candy pieces and the cake.

10884661_796117350455871_1514191124_n

Happy New Year from us! I hope that you find your year full of blessings.

Next week on the 9th I’m finally having my wrist surgery. Which means it will be roughly 3-4 months before I’ll be able to decorate again.

Mrs.Hess, out.

A Christmas Cheesecake

10819052_781075428626730_207416993_n

It’s Christmas time, which is my favorite time of year.

10841163_781075858626687_1904976146_n

There’s something about the air outside, crisp and cool.

10834193_781076475293292_155965905_n

There’s also something about the desserts that can be made. From cookies to cheesecakes everything is big and grand and just plain beautiful.

10834008_781074901960116_1064916627_n

Which brings me to the design of this Christmas Cheesecake. I wanted it be rich and luxurious. Simple, but delicate and inspiring.

10487016_781089578625315_1226685432_n

The cheesecake itself turned out perfectly.

10859548_781089798625293_557947575_n

Then I decided to pair the cheesecake with a light and refreshing peppermint whipped cream, which I use on a lot of my Christmas desserts.

10836224_781089958625277_854129355_n

For the wrap I measured some parchment paper and drew the design on the opposite side so I could trace it with the chocolate.

10846659_781090178625255_1816401113_n

I had originally put a boarder on top, but I put the wrap on too late and the chocolate was too hard. So after it cooled I used a hot knife to cut it off.

10822528_781075048626768_955799800_n

I also made a new light box. These boxes are an amazing and cheap way to take professional-looking food pictures.

10819052_781075428626730_207416993_n

I wanted to thank everyone for your prayers and kind words following my previous post. I hope that everyone has a beautiful Christmas filled with God, family and friends.

Mrs.Hess, out.

Homemade Cinnamon Rolls

This past weekend I woke up feeling overly passionate about food with a deep desire to knead dough. 

1910503_703821419685465_5721248232842572861_n

So I woke up before Sam and began the process of making cinnamon rolls from scratch. The recipe that I use is only a one-rise and takes around 2 hours to make. 

10322734_703821343018806_1473901623990538295_n

While making these cinnamon rolls I felt the love and passion going into them, which is why I have decided to make this post in black and white. There’s a certain type of simplicity in kneading dough and cutting the rolls. It takes time, patience and love to create a delicious cinnamon roll. I was at a food demonstration last night where the chef said, “If you’re rushing while cooking then you probably shouldn’t be in a kitchen at all.” 

10500341_703825403018400_1752997577235445962_n

Recipe:

2 3/4 cups flour

3 tsbp sugar

1 tsp salt

2 1/4 tsp yeast

1/2 cup water

1/4 cup milk

2 1/2 tbsp unsalted butter

1 large egg

Filling:

3 tbsp unsalted butter

1 1/2 tbsp cinnamon

1/4 cup sugar

*Note that I never follow the filling recipe. Sometimes I use more butter to make the filling more gooey, or I add more cinnamon or sugar. 

1.) In a large bowl mix together 2 1/4 cup of flour, sugar, salt and yeast together. Set aside.

2.) Heat water, milk and butter in microwave until butter is melted and mixture is hot to the touch. Stir butter mixture into flour mixture. Add the egg and some of the extra flour to make a soft dough. The dough will be ready when it gently pulls away from the side of the bowl. Knead for 4 minutes and let rest for 10. 

3.) After 10 minutes roll the dough out in a 14×8 rectangle. Spread melted butter on top and sprinkle the cinnamon and sugar on top. Roll up dough tightly. Cut into even pieces and place in lightly greased 9” pie dish. 

4.) Preheat the oven to 200 degrees. Lightly cover the rolls with foil, turn the oven off, and set them inside until they’ve doubled in size. (About 60 minutes.)

5.) Take the rolls out and preheat the oven to 375 degrees. Then bake them for 25-30 minutes. To prevent them from burning cover after 15 minutes. 

The Perfect Cinnamon Roll Icing:

1 stick unsalted butter

2 cups powdered sugar

1 tbsp milk

couple dashes of vanilla

1.) Melt the butter

2.) Add powdered sugar and stir well.

3.) Slowly add the milk and vanilla and mix well.

editeddddd

These cinnamon rolls would be a perfect addition to a weekend morning. 

eieididi

editedcinnamon

Mrs.Hess, out.


Blueberry Cookies with Lemon Drizzle


10462905_700488963352044_7864850093034344275_n


So the thing about these cookies are that they are amazing. I mean it doesn’t get much better than biting into a cookie and having your mouth fill with the juice of fresh blueberries. 

However I was slightly disappointed that their texture turned out to be more scone like than I had intended for them to. I also wish that I had added some more lemon juice and vanilla to the dough to give it a little extra kick of flavor. 


10510142_700488816685392_510835845_n

Recipe:

1/2 cup butter, room temperature

1 cup sugar

1 large egg, beaten

1/2 tsp lemon juice

1/2 cup milk

2 1/2 cups all purpose flour

1 cup fresh blueberries

*Note that when I make these cookies again I’ll be altering the recipe to having 1 1/2 tsp of lemon juice and 1 tsp of vanilla and then taking out 2 tsp of milk. 

Glaze:

1/2 cup powdered sugar

1 to 1 1/2 tbsp freshly squeezed lemon juice

Directions: 

1.) Preheat oven to 375 degrees.

2.) Cream butter and sugar in mixing bowl.

3.) Slowly add the flour, making sure to alternate with the milk and lemon juice. (Make sure to not mix the milk and lemon juice prior to adding it to the flour. It will start to clump up.) 

4.) Carefully stir in the blueberries and drop batter 1-1/2 inches apart on greased cookie sheet. 

5.) Bake 10-12 minutes.

6.) Transfer the cookies to cooling rack and let cool completely before drizzling the cookies with the glaze. 

10545002_700488706685403_1324868685_n

I’ve been really busy this past month so I have 5 or 6 recipes that are all photographed and ready to be put onto the blog and I plan on putting up a couple more today. 

Regardless of when I get to them I hope that you have a blessed day! 

Mrs.Hess, out. 


Strawberry Pie

Image

Summertime means juicy strawberries.  Juicy strawberries means delicious desserts. Which all equals into making me one happy camper. Why not make your summer a little bit better by digging into a delicious Strawberry Pie?

Image

But before you can dig into it you have to make it. Which is okay because this recipe is super simple and only requires a few ingredients.

I got this recipe from Taste From Home, but my laptop isn’t hyperlink friendly. If you wish to visit the original page here it is: http://www.tasteofhome.com/recipes/easy-fresh-strawberry-pie

Ingredients:

1 unbaked pastry shell

3/4 cup sugar

2 tbsp corn starch

1 cup water

1 Package (3 oz) strawberry jello

4 cups fresh strawberries, sliced

Whipped Cream:

1 cream cheese

1/2 cup sugar

2 cups heavy cream

1 tsp vanilla

First make your pie crust. I’m in the process of learning how to make it homemade so I just used the Pillsbury ready to roll out crusts.

Then in a saucepan combine sugar, cornstarch and water until smooth. Bring it to a boil. Continue to cook and stir until it thickens, about 2 minutes. Remove from heat and stir in gelatin until it dissolves. Refrigerate for 15-20 minutes.

Meanwhile arrange the strawberries in the crust. Once the mixture has set pour it over the berries.

Image

Now it’s time to make my favorite Whipped Cream. Starting with the paddle attachment cream together the cream cheese, sugar and vanilla. Then switch to the frosting attachment and slowly start adding the heavy cream. Set it on medium speed and then walk away for about ten minutes. Pipe the pie however you want to. I used the star tip and a circle tip.

The last step is the hardest… Putting it back into the fridge for 2 hours.

Image

The Whipped Cream wrapped around the Strawberries delicately, enhancing their juicy and sweet nature. I hope that you enjoy this Strawberry Pie as much as my husband and I did.

So May 18th was our one year anniversary. Sam semi-surprised me with an ocean front hotel room at Virginia Beach. We had such a wonderful weekend enjoying each other’s company and the ocean. We even got stopped by someone who asked us if we were enjoying our honeymoon… So we must be doing something right!

10329266_672070819527192_3482679038162243174_n


I’m also going back to college for my AA  in Baking and Pastry Arts.  I am so excited for this opportunity to learn more and to work towards becoming a Pastry Chef. Lastly, I’ve booked my very first order and will be delivering it this week! There is just too much excitement and God keeps on pouring the blessings on me.

That’s all for now.

Mrs.Hess, out.